

Table of Contents
- How Many Patches Per Trip: Calculating Your Supply
- Trip Length and Time Zone Changes
- Understanding Patches Per Day: Day and Night Protocol
- How Long to Wear a Transdermal Patch for Best Results
- Packing Patches for Travel: A Practical Checklist
- Sleep Patch Safety: What to Know Before You Go
- Choosing the Right Patch System for Your Trip
- Frequently Asked Questions
Last Updated: October 5, 2026
How Many Patches Per Trip: Calculating Your Supply
The honest answer: one Day Patch and one Night Patch per day of support, plus one spare set for delays.
At Reset Jet Lag, we built our system around that math. One pack covers a short trip; a two-pack covers most two-week journeys.

"Patches per trip" means different things depending on who's asking: sleep patches, motion sickness patches, or nicotine and medication patches.
Trip Length and Time Zone Changes
Trip length sets your baseline. Time zone changes decide how many extra patches to pack.
A three-day trip across two time zones is easy. A two-week trip across ten zones is not. The wider the gap, the longer your body needs support on both ends.
Here's a simple way to think about it:
- Same time zone: pack one set per day, no buffer needed
- 1-3 zones: add one extra set
- 4-6 zones: add two extra sets
Eastbound travel tends to hit harder than westbound. If you're flying east, lean toward the higher end of that range.
A Simple Formula for Packing
Use this formula before every trip:
Total patches = (Trip days × 2) + (Time zone buffer × 2) + 2 spare
The "× 2" accounts for one Day Patch and one Night Patch per day; the spare set covers flight delays, lost luggage, or a patch that won't stick.
Flying New York to Tokyo for eight days: 8 × 2 = 16 patches, plus a 3-set buffer for the 13-hour shift = 6 more, plus 2 spare. Total: 24 patches.
That's exactly one Reset Jet Lag two-pack.
Understanding Patches Per Day: Day and Night Protocol
Most travel patch systems run on a two-patch-per-day rhythm: one in the morning, one before bed. Our Day Patch delivers B-complex vitamins, Vitamin C, and Vitamin E; our Night Patch blends melatonin, magnesium, hops, and valerian root.
Why split day and night? Because your body runs two jobs on two schedules: daytime needs focus and steady energy, nighttime needs wind-down and sleep pressure. A single all-purpose patch can't do both well.
How Long to Wear a Transdermal Patch for Best Results
A transdermal patch is a thin adhesive strip that delivers ingredients through the skin over a set window, for travel patches, typically up to 8 hours. Wearing one longer doesn't make it stronger; it usually just irritates the skin.
Here's the practical schedule:
- Day Patch: apply in the morning, remove after 8 hours
- Night Patch: apply before bed, remove after 8 hours
- Rotate sites: move each patch to a different spot to let skin rest
On travel days, shift your timing. Landing at 6 a.m. local time after an overnight flight, a Day Patch helps you push through to a normal bedtime.
Packing Patches for Travel: A Practical Checklist
Before you pack, decide which kind of patch the trip calls for. "Patches per trip" splits into at least four questions, and the answer depends on which one you're asking:
- Tire and inner-tube patches, how many spare patches to carry for roadside or trailside flats
- Transdermal wellness patches, sleep, motion sickness, or nicotine patches worn on a schedule
- Clothing and gear repair patches, fabric patches for jackets, tents, or packs
Most searches for "how many patches per trip" mean tire and tube patches, so this section leads with that. For wellness patches, skip to the checklist at the bottom.
Tire and Tube Patches: How Many to Carry
A patch kit is only useful if it covers the flats you're realistically going to get. No universal number exists, but a few rules of thumb hold up across bicycles, motorcycles, and cars:
- Short local rides (under 10 miles): 2-3 patches plus one spare tube. You're rarely more than a phone call from help.
- Half-day rides (10-30 miles): 3-5 patches plus one spare tube. Bring a second tube if you're running tubeless and carrying a plug kit instead.
- Full-day rides or remote routes (30+ miles): 5-8 patches, one or two spare tubes, and a plug kit if tubeless. Assume you'll flat more than once on rough surfaces.
For cars and motorcycles, a single spare tire plus a plug kit and 2-3 patches covers most roadside scenarios. Modern tubeless tires can often be plugged and driven to a shop, so you rarely need a stack of patches in the trunk.
What Actually Changes the Count
Route and rider factors matter more than any fixed number:
- Surface: Glass, goatheads, and construction debris raise flat frequency sharply. Paved greenways are gentler than gravel or urban shoulders.
- Weather: Wet roads lift debris into tires, so rainy seasons and post-storm rides produce more punctures.
- Tire condition: Worn tread and thin sidewalls flat more easily.
A Simple Decision Guide
Use this to size your kit before you leave:
Reset Jet Lag Travel Patch System - 1 Pack (12 Patches) →
- Estimate total miles for the trip.
- Multiply by your typical flat rate, most riders flat once every 1,000-3,000 miles on paved roads, more often on rough surfaces.
- Round up, then add one buffer patch and one spare tube.
- If the route is remote, double the buffer.
A 60-mile gravel ride with a history of one flat per 500 miles suggests at least one flat and a buffer, so 3-4 patches and one spare tube is reasonable.
The Trip Repair Kit Checklist
- Patches sized for your tube or tire (round patches for small punctures, oblong for larger cuts)
- Patch cement or self-adhesive patches, depending on your kit type
- Tire levers (two minimum)
Check the kit before every trip: patch cement dries out, CO2 cartridges leak, and spare tubes develop pinholes when folded in the same spot for months. A five-minute pre-ride check beats a 30-minute walk home.
Wellness Patch Checklist (If That's Your Trip)
If your trip is about sleep or motion sickness patches rather than tires:
- One patch per day of travel, plus one per night if your system uses a day-night split
- Two spare sets for delays or lost luggage
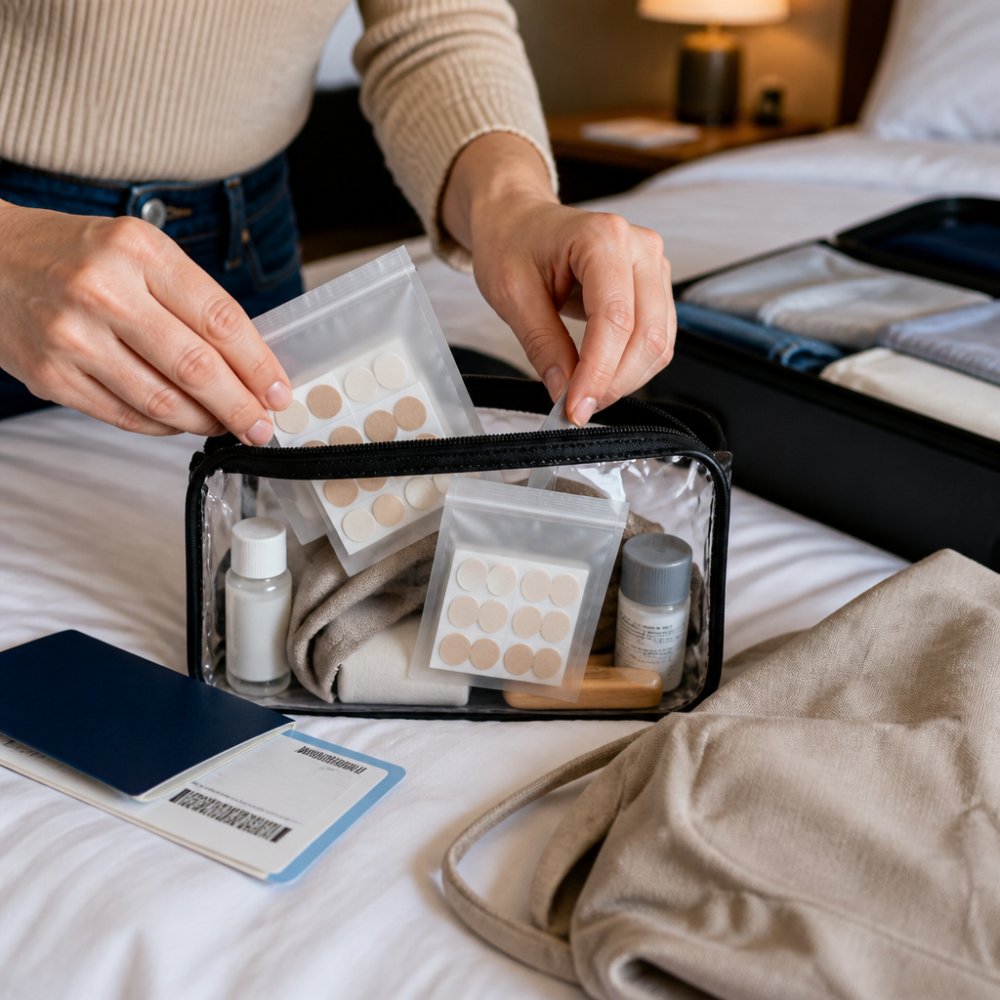
- Original resealable pouch to keep patches fresh
Keep patches in your carry-on, not checked luggage. Security screening isn't an issue for standard adhesive patches, and the original pouch keeps labels readable.
Sleep Patch Safety: What to Know Before You Go
Safety rules differ sharply by patch type. This section covers both the tire and tube side that dominates search results and the transdermal side for wellness patch users.
Tire and Tube Patch Safety Limits
A patch is a repair, not a permanent fix. Every patch weakens the tube slightly and adds a stress point. The general guidance most shops and experienced riders follow:
- One patch per tube is fine. Two patches on the same tube is common and usually safe if they're spaced apart.
- Three or more patches on one tube is a signal to replace it. The tube has taken enough damage that a new puncture is likely, and a patch failure at speed is worse than a slow leak.
- Never patch a sidewall. Sidewall damage on a tire cannot be safely patched because the sidewall flexes constantly. Replace the tire.
A correctly applied patch on a small puncture can last months or years. A patched tire is a temporary repair, get it inspected and plan to replace it.
When to Replace Instead of Patch
Replace the tube or tire rather than patching when:
- The puncture is in the sidewall or near the valve stem
- The tube already has three or more patches
- The tire has more than one puncture within a few inches
- The tire shows cords, bubbles, or uneven wear
What to Do When a Patch Fails Mid-Trip
A failed patch usually shows up as a worsening slow leak or sudden pressure loss. The roadside sequence:
- Stop riding or driving. Continuing on a failing patch can damage the rim or wheel.
- Move to a safe spot away from traffic.
- Inspect the patch. If it's peeling, the adhesive failed, likely from a dirty or oily surface at install time.
- Install your spare tube if you have one, faster and more reliable than re-patching roadside.
- Re-patch only if you have no spare. Clean the area, rough it with sandpaper, apply cement, let it tack up, then press the patch firmly for at least a minute.
- Inflate slowly and listen for leaks before riding.
- If you can't fix it, call for help. Walking a bike several miles or driving on a flat is worse than waiting.
Signs a Patch Is Failing
- Slow pressure loss overnight
- A visible bubble or lifted edge on the patch
- A bulge in the tire above the repair
- Vibration or thumping while riding
If you see any of these, replace the tube or tire before your next trip rather than re-patching.
Transdermal Patch Safety
For wellness patches, sleep, motion sickness, or nicotine, the rules differ:
- Start with a patch at home before you fly, so you learn how your skin reacts without trip stress.
- Clean, dry skin only. Oils and lotions weaken adhesion.
- Rotate application sites. The same spot every night can cause irritation.
- Respect the wear window. Most transdermal patches are designed for a set number of hours; leaving one on longer does not increase the effect.
National Highway Traffic Safety Administration guidance on tire safety and inspection
Choosing the Right Patch System for Your Trip
Match the system to your trip, not a marketing page.
| Trip Type | Days | Patches Needed | Best Pack Size |
|---|---|---|---|
| Weekend getaway | 3 | 6 | 1 Pack (12) |
| One-week trip | 7 | 14 | 2 Pack (24) |
| Two-week trip | 14 | 28 | 3 Pack (36) |
| Monthly flyer | 4 trips | 24+ | 3 Pack (36) |
Each Reset Jet Lag patch is 30mm x 30mm, ultra-thin, and discreet under clothing, with medical-grade hypoallergenic adhesive and a breathable backing built for all-day comfort.

Pricing runs $21.99 for the 1 Pack, $39.58 for the 2 Pack, and $56.07 for the 3 Pack.
Fly a few times a year? Start with the 1 Pack. Fly monthly? The 3 Pack is the smarter buy.
CDC guidance on jet lag and travel sleep
Frequently Asked Questions
How many patches should I pack for a 7-day trip?
For a 7-day trip, pack 14 patches if you plan to use the day and night protocol daily. That's one Day Patch each morning and one Night Patch each evening. Add 2-3 extra patches as backup for unexpected delays or extended travel. A 2-pack of Reset Jet Lag (24 patches) covers a week with room to spare.
Can I wear more than one transdermal patch at a time?
You should not wear more than one patch at a time unless the product instructions specifically allow it. Reset Jet Lag uses a separate Day Patch and Night Patch, each worn for up to 8 hours. Wearing multiple patches simultaneously could deliver more ingredients than intended. Follow the recommended schedule: one Day Patch in the morning, one Night Patch before bed.
What happens if I forget to change my patch while traveling?
If you forget to remove a patch, take it off as soon as you remember and apply the next scheduled patch at its normal time. Do not double up to catch up. Reset Jet Lag patches are designed for up to 8 hours of wear. Setting a phone reminder for morning and evening applications helps keep your protocol on track during busy travel days.
Is it safe to use sleep patches every night during a trip?
Reset Jet Lag patches are non-habit forming and designed for daily use during travel. The Night Patch contains melatonin, magnesium, hops, and valerian root to support your natural sleep rhythm. If you have sensitive skin, rotate application sites to reduce irritation. Always check with your doctor if you take medications or have underlying health conditions before using any transdermal patch system.
Jet lag doesn't have to cost you your first two days on the ground. The right supply, packed the right way, keeps your body on schedule from the moment you land. Reset Jet Lag's transdermal system delivers a Day and Night protocol with plant-based ingredients and vitamins, no pills or caffeine, and it's non-habit forming. Get started with Reset Jet Lag and arrive ready to work, explore, and stay present.